Friday, December 28, 2012

Milk Cinnamon Rolls with TangZhong method

Had plenty of free time today so I spent the afternoon baking this for breakfast the next day!


INGREDIENTS:
A
350g High grade flour (bread flour)
55g Caster sugar (I used normal granulated sugar)
8g Salt
9g Instant dry yeast
B
40g egg, lightly beaten (1 egg reserve the leftover for egg wash)
110g Tang zhong (water-roux)*
110ml milk
C
22g unsalted butter

*Tang zhong (water-roux) starter
25g bread flour
125ml milk
Mix both under heat and stir until you can get streaks :) Like a gelatin texture!


Filling:
1 tbsp Cinnamon powder (to your liking )
30g Brown/Raw sugar ( I would add more)
80g raisin (optional)
25g unsalted butter, melted
 
Hand Knead Method:

1.       Mix all the A dry ingredients in a mixing bowl. Make a well in the centre and add in egg and Tangzhong mix well.


2.       Slowly add in milk, mixture will really sticky, use spatula to mix for 5 min, dough will form rough dough.

3.       Transfer dough to a lightly floured work surface. Knead the dough till smooth. This should take about 10mins. It helps to have a dough scraper or butter knife on hand to scrape up the dough as your knead.


4.       Knead in melted butter, be ready to deal with oily dough and be persevering to knead until dough becomes smooth and elastic. This should take about another 10-20 min (much depend on your kneading skill). Test doneness, if dough can be pulled into a thin membrane without tearing/breaking apart easily, dough is ready to set aside to proof.


5.       Place dough in a lightly greased mixing bowl, cover with light greased cling wrap and let proof in a closed oven for about half hour to an hour, or until double in bulk.
6.       Mix cinnamon powder and sugar together. Reserve about 1 teaspoon of the mixture.
7.       Once dough double test doneness using finger test, slightly poke a finger into dough and if impression remained, dough has nicely risen. Remove and punch down the dough from the bowl.
8.       Roll the dough into a rectangle, about 25cm by 40cm. Brush surface with melted butter.
9.       Sprinkle the cinnamon/sugar mixture over the dough surface. Roll over the surface with a rolling pin; this is to make sure the fillings will stick onto the dough.
10.   Roll up the dough to form a log shape. Pinch the edges to seal.
11.   Place the log seam side down, trim off the two ends. With a sharp knife, cut the roll into 15 equal pieces.
12.   Arrange the rolls cut-side up lined with parchment paper (or in a greased) square pan or any suitable baking tray.


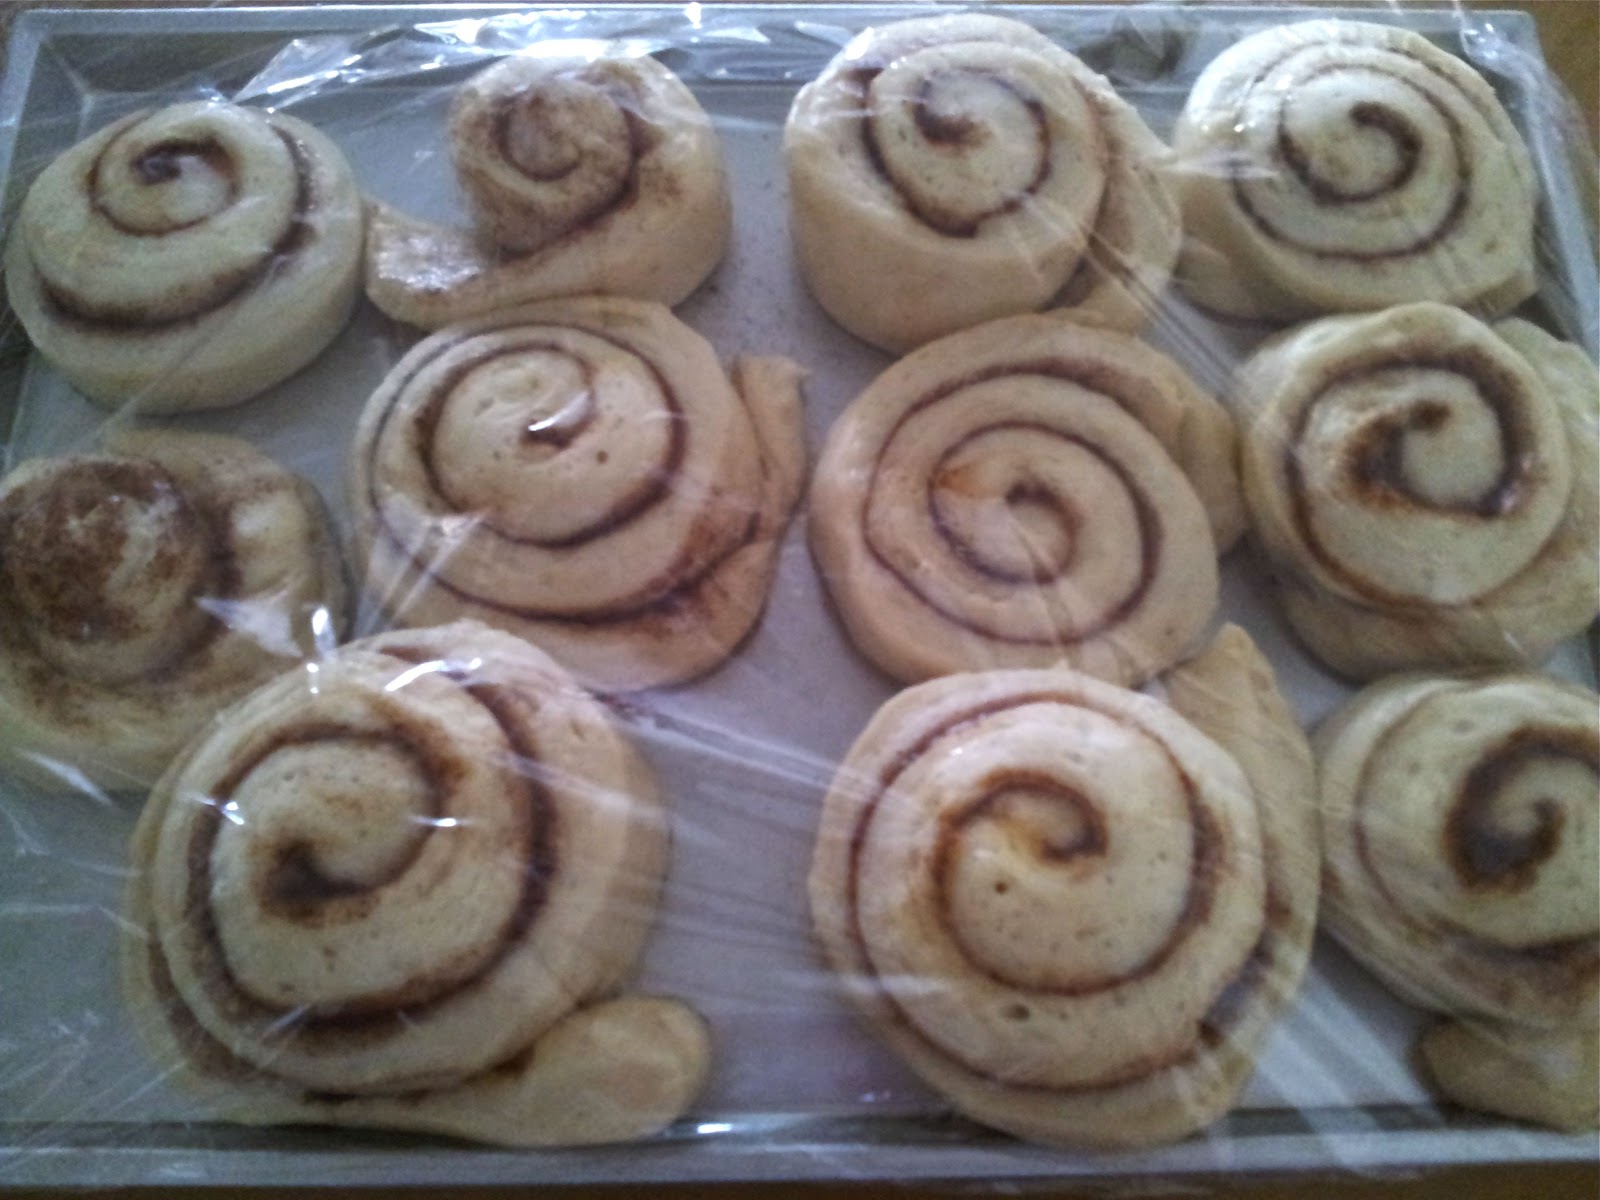
13.   Leave some space in between the rolls to allow further expansion. Cover with damp cloth or cling wrap and leave shaped dough to proof for the second time for about 45mins, or until double in size.


Don't mind the awkward sizes. I didn't throw away the ends haha


14.   Brush top with egg wash (mix leftover egg with 1 tbsp water) and sprinkle the reserved cinnamon sugar mixture over the top.
15.   Bake in pre-heated oven at 180 deg C for 15-20 mins or until golden brown. Remove from oven and once cool store immediately in an airtight container.


SO FLUFFY!
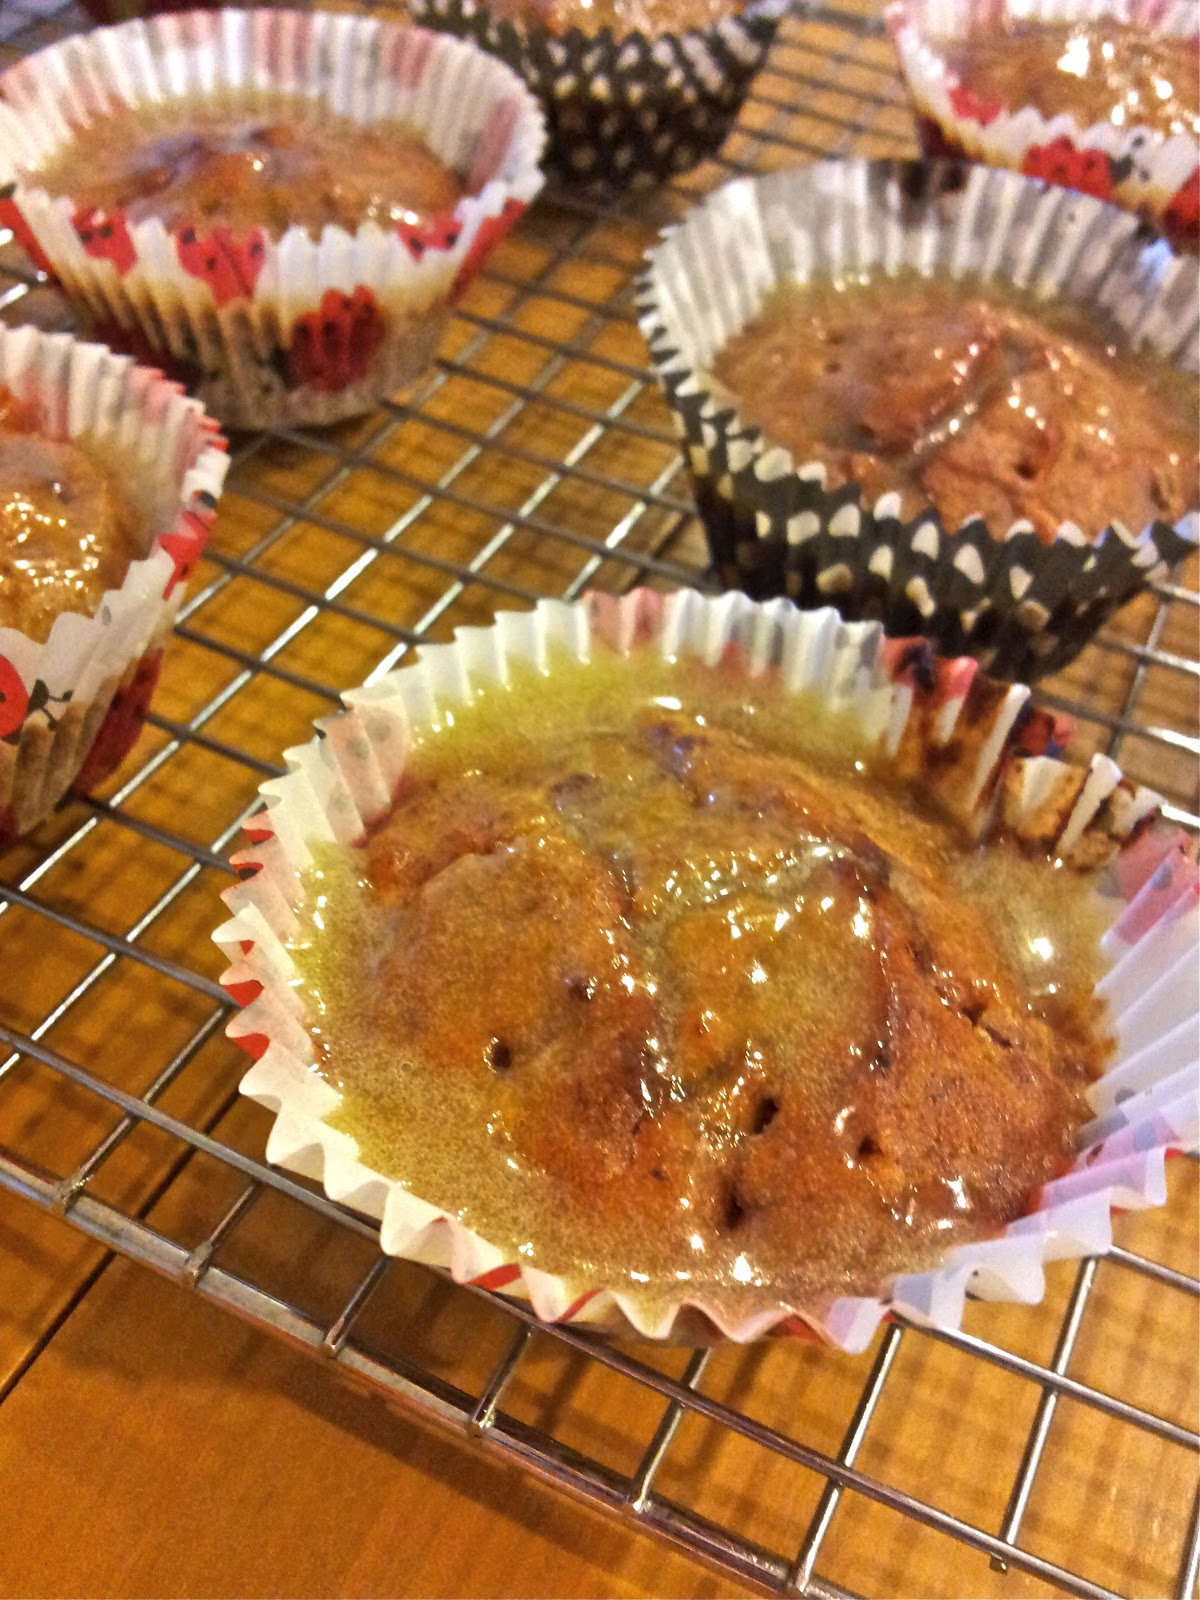
You can also add a glaze over it to make it 'shiny' haha. I think it goes well with condensed milk! I ate some with the leftover butterscotch sauce from the previous sticky date pudding baking session and it tasted good too!

Everyone should bake bread with this TangZhong method! You won't regret it!  GO GO GO ^^

Tuesday, December 25, 2012

MERRY CHRISTMAS!

Christmas Eve was spent at Sean's aunts' place for a christmas bbq at StarVille. It's like an almost annual ritual to spend xmas eve there. :) Reminisced about secondary school days and realised we all did nonsensical stuff back then.

Headed back up to the house after bbq-ing and played poker, mahjong, and Bang! Exchanged gifts for Secret Santa and I must say everyone enjoyed themselves. Maybe except Jack because he came down with food poisoning during the night. Must be the weird noodles from the Ban Mian stall at TM food court that he ate. So poor thing! Was supposed to stayover but changed our minds in the early morning plus the fact that JZ drove.. haha. In the end around 5ish, headed to the A&E in Changi General Hospital to get the meds he needs. Cabbed home with him after that and reached home about 630am?  The queue at CGH was pretty fast and we were attended upon more or less straightaway! Got home and I saw people just waking up. Nocturnal creature hehe.


Baked by Trisha :)


Gift Exchange!

Gift Exchange!


WHAT AN EVENTFUL NIGHT! OHWELL BUT I HAD FUN!
MERRY CHRISTMAS FOLKS!

Thursday, December 20, 2012

Sticky Date Pudding with Butterscotch sauce


Had cravings for sticky date pudding after I ate one a few months back. Finally got down to business to make one. hehe. I think this is a great recipe during the Ramadan period where there is an abundance of dates. I think only select supermarkets carry dates during the other times of the year. I bought the Deri dates from the Fairprice Xtra at Changi Business Park for $4.99 for a box of 300g i think. There were other dates there that were pricier, and I believe might be nicer?
I'm not a date expert haha. someone enlighten me????


Recipe adapted from The Little Teochew

For the Sticky Date Pudding
- 270g (1 1/2 cups) deseeded dried dates (I used Deri dates because it was one of the cheaper ones hehe. Trying to save cost!)
- 312ml (1 1/4 cups) water
- 1 teaspoon bicarbonate of soda (I substituted this with 3 teaspoons of baking powder)
- 60g (1/4 cup) butter, roughly chopped
- 2 large eggs
- 1 teaspoon (5ml) vanilla extract
- 188g (1 1/4 cups) self-raising flour (I substituted this with plain flour + slightly less than 2 teaspoons of baking powder, and 1/2 teaspoon of salt)
- 150g (2/3 cup, firmly packed) brown sugar (I reduced to 100g)


Spent a while deseeding these dates. So sticky hehe. Popped a bit into my mouth ^^


1. Place dates and water in a small saucepan over high heat. When the mixture starts to boil, add bicarbonate of soda and 60g butter, and remove from the heat. Stir and then set aside for 25 minutes (the butter will melt during this time).

2. Preheat oven to 180 degrees Celsius (160 degrees Celsius fan-forced). If you are not using a fan-forced oven, adjust the oven rack to the lower half of the oven so the top of the pudding will be in the centre of the oven.

3. Line a muffin tin with cupcake liners. Another alternative would be to grease a cake tin.

4. Use a potato masher to crush the dates directly in the saucepan


5. Add eggs and vanilla to date mixture and whisk until just combined.


6. Stir flour and 150g (2/3 cup, firmly packed) brown sugar together in a medium bowl. Use the back of the spoon to break up any lumps of brown sugar. Add date mixture to the flour mixture and gently fold the ingredients together until just combined.


Not the prettiest looking batter around!


7. Scoop batter into prepared muffin tins using the handy-dandy ice-cream scoop! If, when baking, the pudding starts to overbrown, loosely cover it with greaseproof paper/aluminium foil. For my case, it didn't brown!


8. Bake the pudding for about 50-60 minutes (about 20-30 minutes if baking in muffin tins), or until it springs back when lightly pressed in the centre. A thin-bladed knife or wooden skewer inserted into the centre of the pudding should come out without any batter attached.

For the Butterscotch Sauce
(adapted from Australian GoodFood Magazine, July 2010, and seen atmuffinsareuglycupcakes and Evan's Kitchen Ramblings


Make the sauce when the pudding is baking.
- 185ml whipping cream
- 165g firmly packed brown sugar (I would reduce the sugar if I made this again! A tad too sweet)
- 150g butter, chopped
- 1/4 teaspoon vanilla extract
- Pinch of salt

1. Melt all the ingredients in a saucepan over medium heat. Stir constantly until mixture thickens. Make sure the sugar does not burn.

2. Leave to cool slightly.


When it's cooked!


Actually, this butterscotch sauce doesn't look gooey when heated. It only thickened slightly in my case. Hard to judge. Might look up better recipes for butterscotch! It tasted good though. :)


According to the Little Teochew, this step makes the pudding sticky:
When the pudding has finished baking, leave it in the pan and allow it to cool for 10 minutes on a wire rack. Using a skewer, pierce several deep holes in the pudding. Pour about 125ml (1/2 cup) of the hot butterscotch sauce over the pudding. Allow to stand for 5 minutes before removing from the pan.
* Note: As I used muffin tins, I removed each individual pudding after they had cooled down a little, but still warm to touch (about 15 minutes after baking). I then pricked them with a toothpick before spooning warm butterscotch sauce over. This helped the sauce penetrate into the pudding, making them extra moist and sticky.

Serve pudding with hot butterscotch sauce and even with vanilla ice-cream. 


Before drizzling butterscotch

After

My mom took a bite before I could capture it :X

You can see the holes i poked hehe


Store leftover pudding and sauce in the refrigerator or freezer (freeze the sauce separately). Suitable to reheat.


My jar of butterscotch! Put it in the fridge and it'll turn more gooey!

Sunday, December 16, 2012

The Hobbit: An Unexpected Journey


Went to watch The Hobbit w the family and bf yesterday! Headed to the Golden Village at Great World City where they screened the hobbit in High Frame Rate 3D! Honestly, I really like the HFR 3D as it was so sharp, not giddy at all and the effects were spectacular especially the scenic scenes. Missing New Zealand just by watching the movie! I usually dislike 3D movies because it gets very giddy after awhile, but for this movie, despite being 170min, it was great! Hmm, obviously during the more fast action scenes, it can get a bit blurry, but it can't be helped! The cinema screen was HUGEEEEEE & the theatre looked more like a musical theatre than a cinema theatre. Haha but i love it! the seats were all very tilted so you will NEVER get blocked by the person in front. I like. ^^


The story started off a bit slow, but the pace picked up and I was drawn into the adventure. Love the banter between the dwarves! & honestly I have to say that Bilbo is definitely more likeable, wittier and 'stronger' than Frodo in LOTR hehe.

Having read the book before and knowing what to expect, I was pretty surprised Peter Jackson tweaked the story a little though he did stay true to the book (dialogue etc). He brought in elements that were also in the LOTR universe to help blend with the storyline, with many references to the Lord of the Rings trilogy as the Hobbit is technically a prequel.  LOTR fans will surely enjoy! Also, characters like Radagast the Brown & the Necromancer were only briefly mentioned in the Hobbit (book), but they were expanded upon in the film series. I guess it helps in the lead-in to the LOTR trilogy. & if I remember correctly, Radagast played a pretty major role in the LOTR books but not in the film and because of time constraints, he had to be omitted in the Fellowship of the Ring film. Maybe in the future hobbit films, we might see Tom Bombadil HAHA and other characters in Tolkien's Middle Earth :)

Thoroughly enjoyed the movie but sadly, now we have to wait a year till December 2013 to watch The Hobbit: The Desolation of Smaug! :'(

HIGHLY RECOMMENDED! EVERYONE GO WATCH! IF POSSIBLE, IN HFR 3D :X


Wednesday, December 12, 2012

Soft fluffy milk bread (Water roux method)

Since I was pretty free ytd, I decided to have another go at bread-making. It wasn't that the previous times failed, but I just didn't get the soft, fluffy texture I wanted cos home-made bread MUST be eaten fresh to retain its freshness since we don't add bread improvers and stuff. I want my bread to last at least overnight with the same fluffy texture as when it's hot from the oven :) SO I GOOGLED. and I found this water roux (TangZhong) method which was said to keep bread soft and fluffy for several days and the best thing is that it's natural. Just bread flour and water to make it.

"As a brief summary, the “tangzhong” method was created by a chinese woman, Yvonne Chen, who calls herself the bread doctor, who wrote a book which translates to “65 degrees Tangzhong.”  Her method is a natural method of creating a bread that is incredibly soft, bouncy and fluffy, which is often a signature style for asian breads."

"Tang Zhong" method


Ingredients
1/3 cup  bread flour
1 cup water
Directions
1. Mix flour and water together and whisk until it is completely dissolved and no lumps remain.

2. Pour mixture into a small pot and turn on medium heat. Begin stirring constantly as the mixture heats up. It will begin to thicken.  When the temperature of the mixture reaches 65 degrees Celsius, turn off the stove and take the mixture off the stove to let it cool. I used a thermometer but I’ve read from Christine’s website and several others that you can sort of eye it. If you are continually stirring, the mixture will start to have “lines ” and then it is done. I started to see lines around the same time the temperature reached 65C.


---------->


3. Once the mixture is cooled, pour it into a bowl and cover the top using plastic wrap. Place the wrap directly onto the mixture to keep it from drying out and put it in the fridge for several hours or overnight. The paste does not keep well, so use within a few days.
I took this milk bread recipe from Kirbie's Cravings and decided to give it a shot!
Ingredients:
2½ cups bread flour
3tbsp+2tsp sugar
1/2 tsp salt (I felt that the bread wasn't 'salty' enough, so I suggest more salt)
1 large egg
½ cup milk
120g tangzhong
2 tsp instant yeast
3 tbsp butter (cut into small pieces, softened at room temperature)

Directions
1. Combine the flour, salt, sugar and instant yeast in a bowl of a stand mixer. Make a well in the center. Add in all wet ingredients: milk, egg and tangzhong. Fit the dough hook attachment on your stand mixer and begin mixing on medium speed and knead until your dough comes together and then add in the butter and continue kneading.  Keep kneading until the dough is smooth, not too sticky on the surface and elastic. I kneaded the dough for about 18-20 minutes. Each mixer may vary.
I didn't have a dough hook so I kneaded by hand all the way! GREAT ARM WORKOUT HAHA. I took approximately 35 mins by hand.
When the dough is ready, you should be able to take a chunk of dough and stretch it to a very thin membrane before it breaks. When it does break, the break should be form a circle.

Taken from http://kirbiecravings.com/2010/12/milk-bread-take-2.html
2. Knead the dough into a ball shape. Take a large bowl and grease with oil.  Place dough into  greased bowl, cling wrap it and leave it in the oven (switched off!). I read that the oven is the best place to let your dough rise cos it's draught-free and warm enough. Let it proof until it’s doubled in size, about 30 minutes.

3. Transfer to a clean surface. Divide the dough into four equal portions. Knead into balls.  Cover with cling wrap, let rest for 15 minutes. (I skipped this resting part cos it was going to be dinner soon!)
4. Roll out each portion of the dough with a rolling pin into an oval shape.  Take one end of the dough and fold to meet the middle of the oval. Take the other end and fold to meet on top.
5. Flip dough over with the folds facing down,and flatten dough with rolling pin.
6. Flip dough over so the folds face up. Now roll the dough up. Place each of the rolls into the bread pan and put a piece of plastic wrap over the rolls. Let them rise until double the size, approximately another 20 min.


The only grouch I have here was that the dough wasn't that smooth. Should have kneaded longer!!!
7. Beat an egg and brush egg mixture on top to create shiny eggwash finish.
8. Bake at 160 degrees Celsius for approximately 30 minutes.

BUT IT TURNED OUT GREATTTT!


The whole loaf is almost gone now hehe. BURP. I might bake another loaf today! ^^
Too lazy to use a camera to take photos, so it was just a point-and-shoot thing with my Galaxy S2. lol. More focused on the bread heh.